
You’re standing at the top of your basement stairs, mentally planning that beautiful finished space you’ve been dreaming about. Extra bedroom for guests? Home theater for movie nights? Maybe a home gym that finally ends your “I’ll go to the gym tomorrow” excuses?
Here’s something most Michigan contractors won’t tell you before they start hanging drywall: you need to test for radon first. Not maybe. Not “we’ll get to it eventually.” Right now, before any finishing work begins.
Why? Because one in four Michigan homes has radon levels above the EPA’s action threshold. That means if you live on a block with eight houses, statistically two of them have a serious radon problem. The kicker is that radon is completely invisible – you can’t see it, smell it, or taste it. And by the time you discover elevated levels after your basement is beautifully finished with drywall, ceiling tiles, and carpeting, fixing the problem becomes exponentially more complicated and expensive.
Let’s talk about what Michigan homeowners actually need to know about radon before spending thousands on basement finishing.
What Is Radon and Why Does It Matter in Michigan?
Radon is a naturally occurring radioactive gas that comes from the breakdown of uranium in soil and rock beneath your home. According to Michigan’s Department of Environment, Great Lakes, and Energy (EGLE), elevated radon levels have been found in all 83 Michigan counties.
That’s worth repeating: all 83 counties. Radon isn’t a question of if – it’s how much.
The Health Risk You Can’t Ignore
Radon is the second-leading cause of lung cancer in the United States, right behind smoking. The American Cancer Society estimates radon exposure causes approximately 21,100 lung cancer deaths annually. For non-smokers, radon is the number one cause of lung cancer.
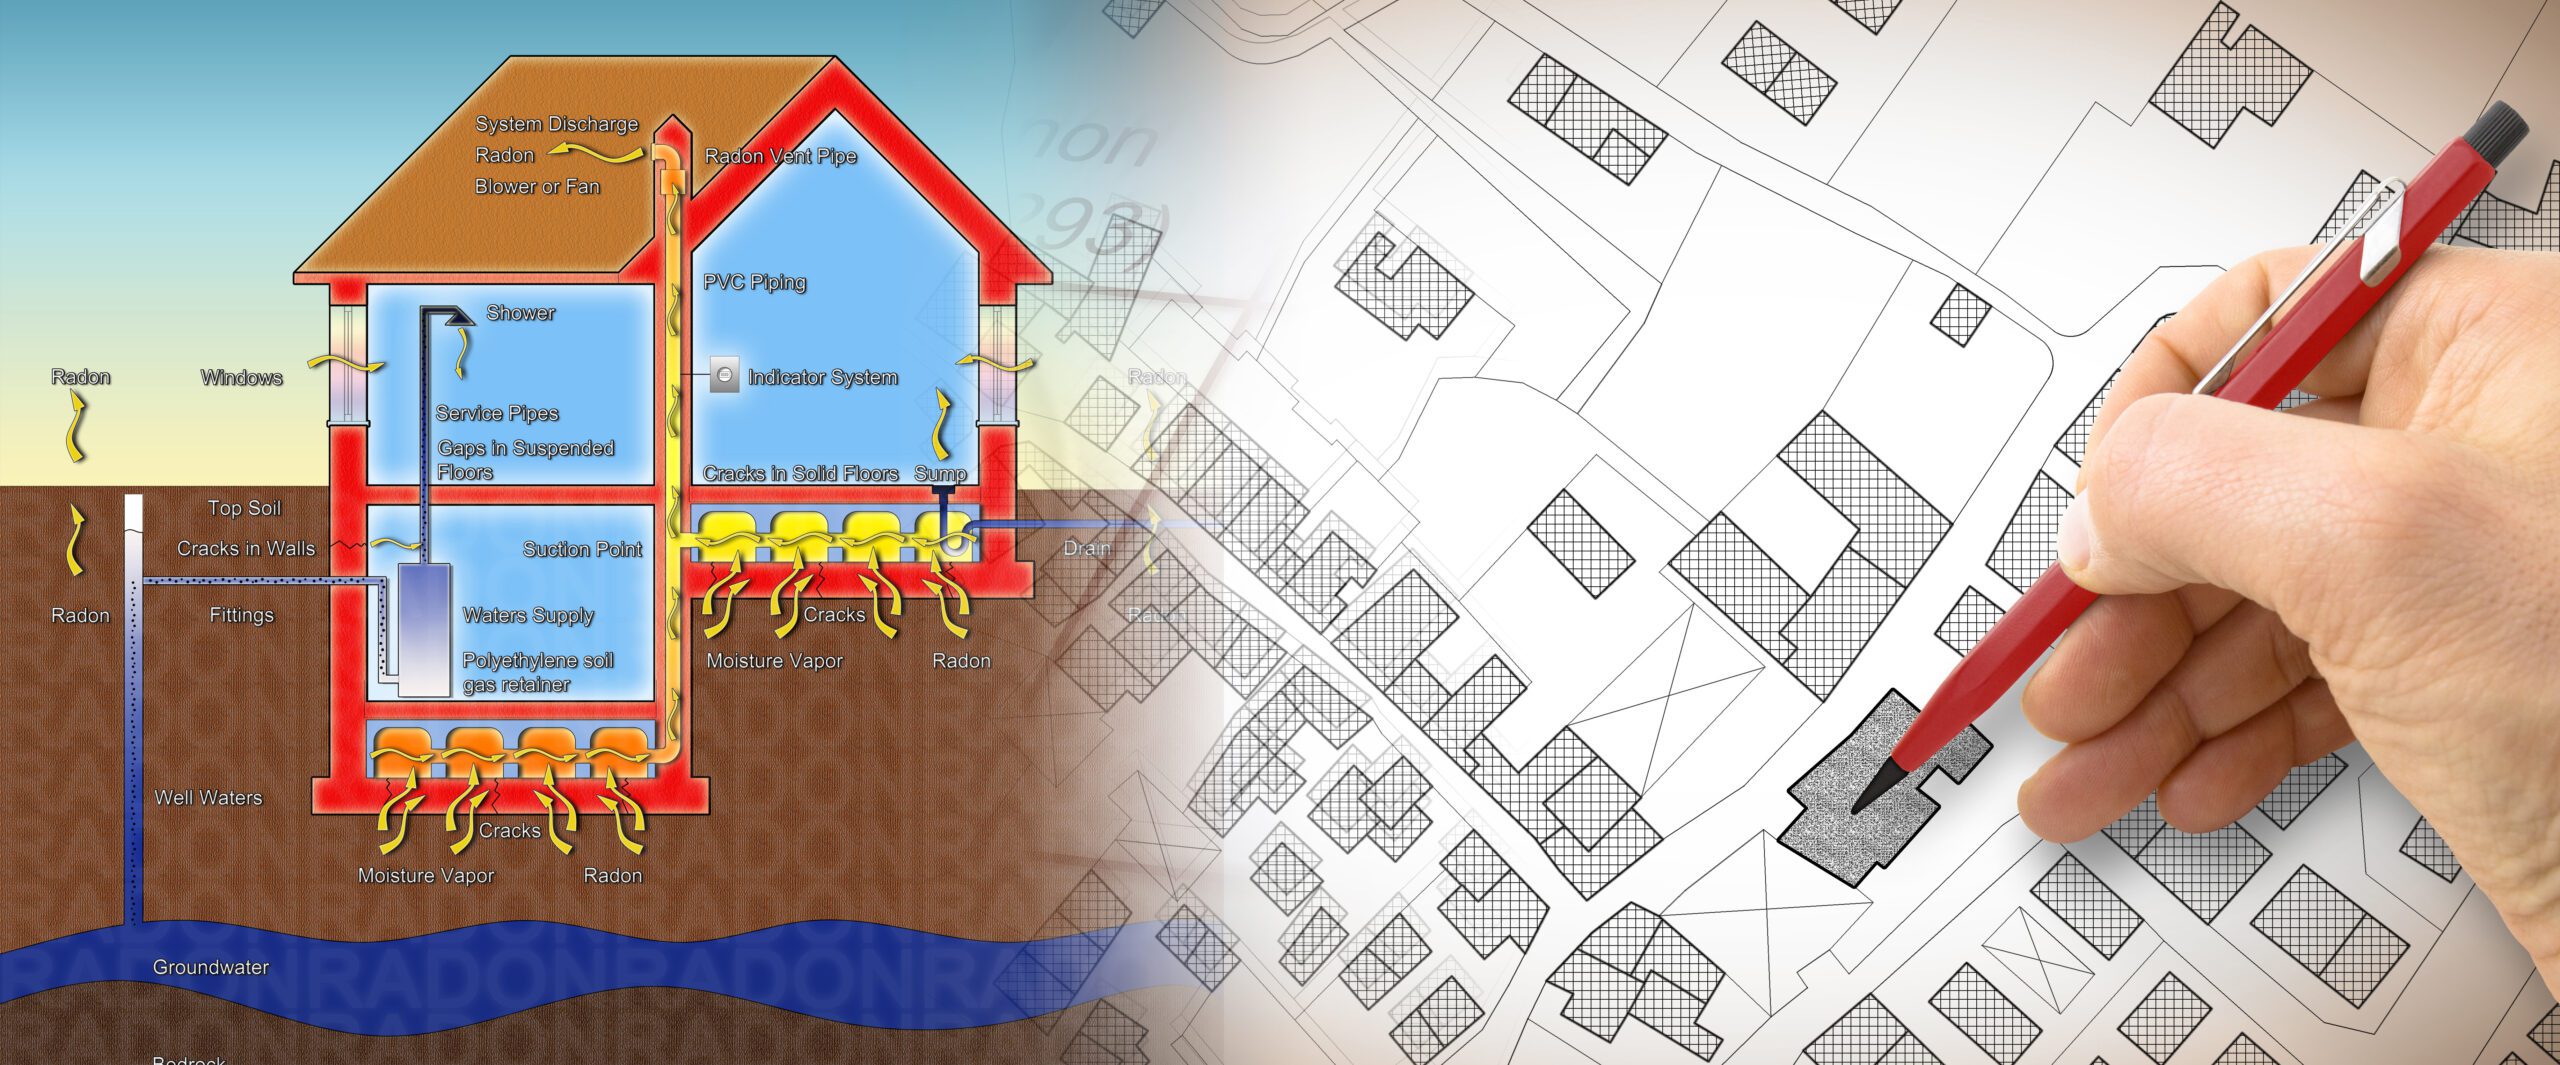
Here’s what makes radon particularly dangerous in finished basements: basements are where radon accumulates most heavily because the gas enters through foundation cracks, floor-wall joints, sump pump openings, and crawl spaces. When you finish a basement and spend more time there – whether working from your new home office, letting kids play in the rec room, or exercising in your home gym – you’re increasing your family’s exposure to whatever radon levels exist in that space.
The EPA action level is 4.0 picocuries per liter (pCi/L). Once radon concentrations exceed this threshold, the EPA recommends taking action to reduce exposure.
Michigan’s Radon Reality: County-by-County Breakdown
Not all Michigan counties face equal radon risk. The EPA divides counties into three zones based on predicted average indoor radon levels:
Zone 1 (Highest Risk – Greater than 4 pCi/L): These counties have the highest predicted radon levels. In Southeast Michigan, this includes Washtenaw, Jackson, Hillsdale, and Lenawee counties.
Zone 2 (Moderate Risk – 2 to 4 pCi/L): Oakland, Livingston, Monroe, Lapeer, and Genesee counties fall into this category. While the predicted average is below the action level, many individual homes still test above 4 pCi/L. Livingston County reports that approximately 40% of homes have elevated radon levels.
Zone 3 (Lower Risk – Less than 2 pCi/L): Wayne, Macomb, St. Clair, and Huron counties are classified as lower risk. However, this classification is based on averages – plenty of individual homes in these counties still have dangerous radon levels.
Here’s the critical point: these zones represent predicted averages across entire counties. Radon levels vary dramatically from house to house, even between next-door neighbors. Your home could sit in a Zone 3 county and still have radon levels of 10 pCi/L or higher. The only way to know your home’s radon level is to test it.
Why January Is the Perfect Time to Test
January is National Radon Action Month, but there’s a practical reason beyond awareness campaigns for testing during winter. Radon levels typically peak during the heating season when homes are sealed tight against Michigan’s brutal cold.
During summer, windows stay open, air circulates freely, and radon dissipates naturally. But from November through March, your home becomes an airtight box. Furnaces create negative air pressure, literally sucking air (and radon) up from the soil beneath your foundation. This means winter radon tests show your home’s worst-case scenario – exactly what you need to know before making finishing decisions.
Michigan’s EGLE distributes free radon test kits through county and city health departments across the state (availability varies by location). These short-term tests take 2-7 days and provide reliable results when you follow closed-house conditions (keeping windows and exterior doors closed except for normal entry and exit).
The Basement Finishing Dilemma: Test Before You Build
Most homeowners don’t think about radon until after they’ve finished their basement. They’re already enjoying their new space when someone mentions radon testing, or they’re selling their home and the buyer’s inspection reveals elevated levels.
Now they’re facing a tough choice: tear out sections of their beautiful finished basement to install mitigation equipment, or try to work around the existing construction in ways that compromise the system’s effectiveness and aesthetic appeal.
What Radon Mitigation Looks Like
The most common radon mitigation system in Michigan is called active soil depressurization. Here’s how it works:
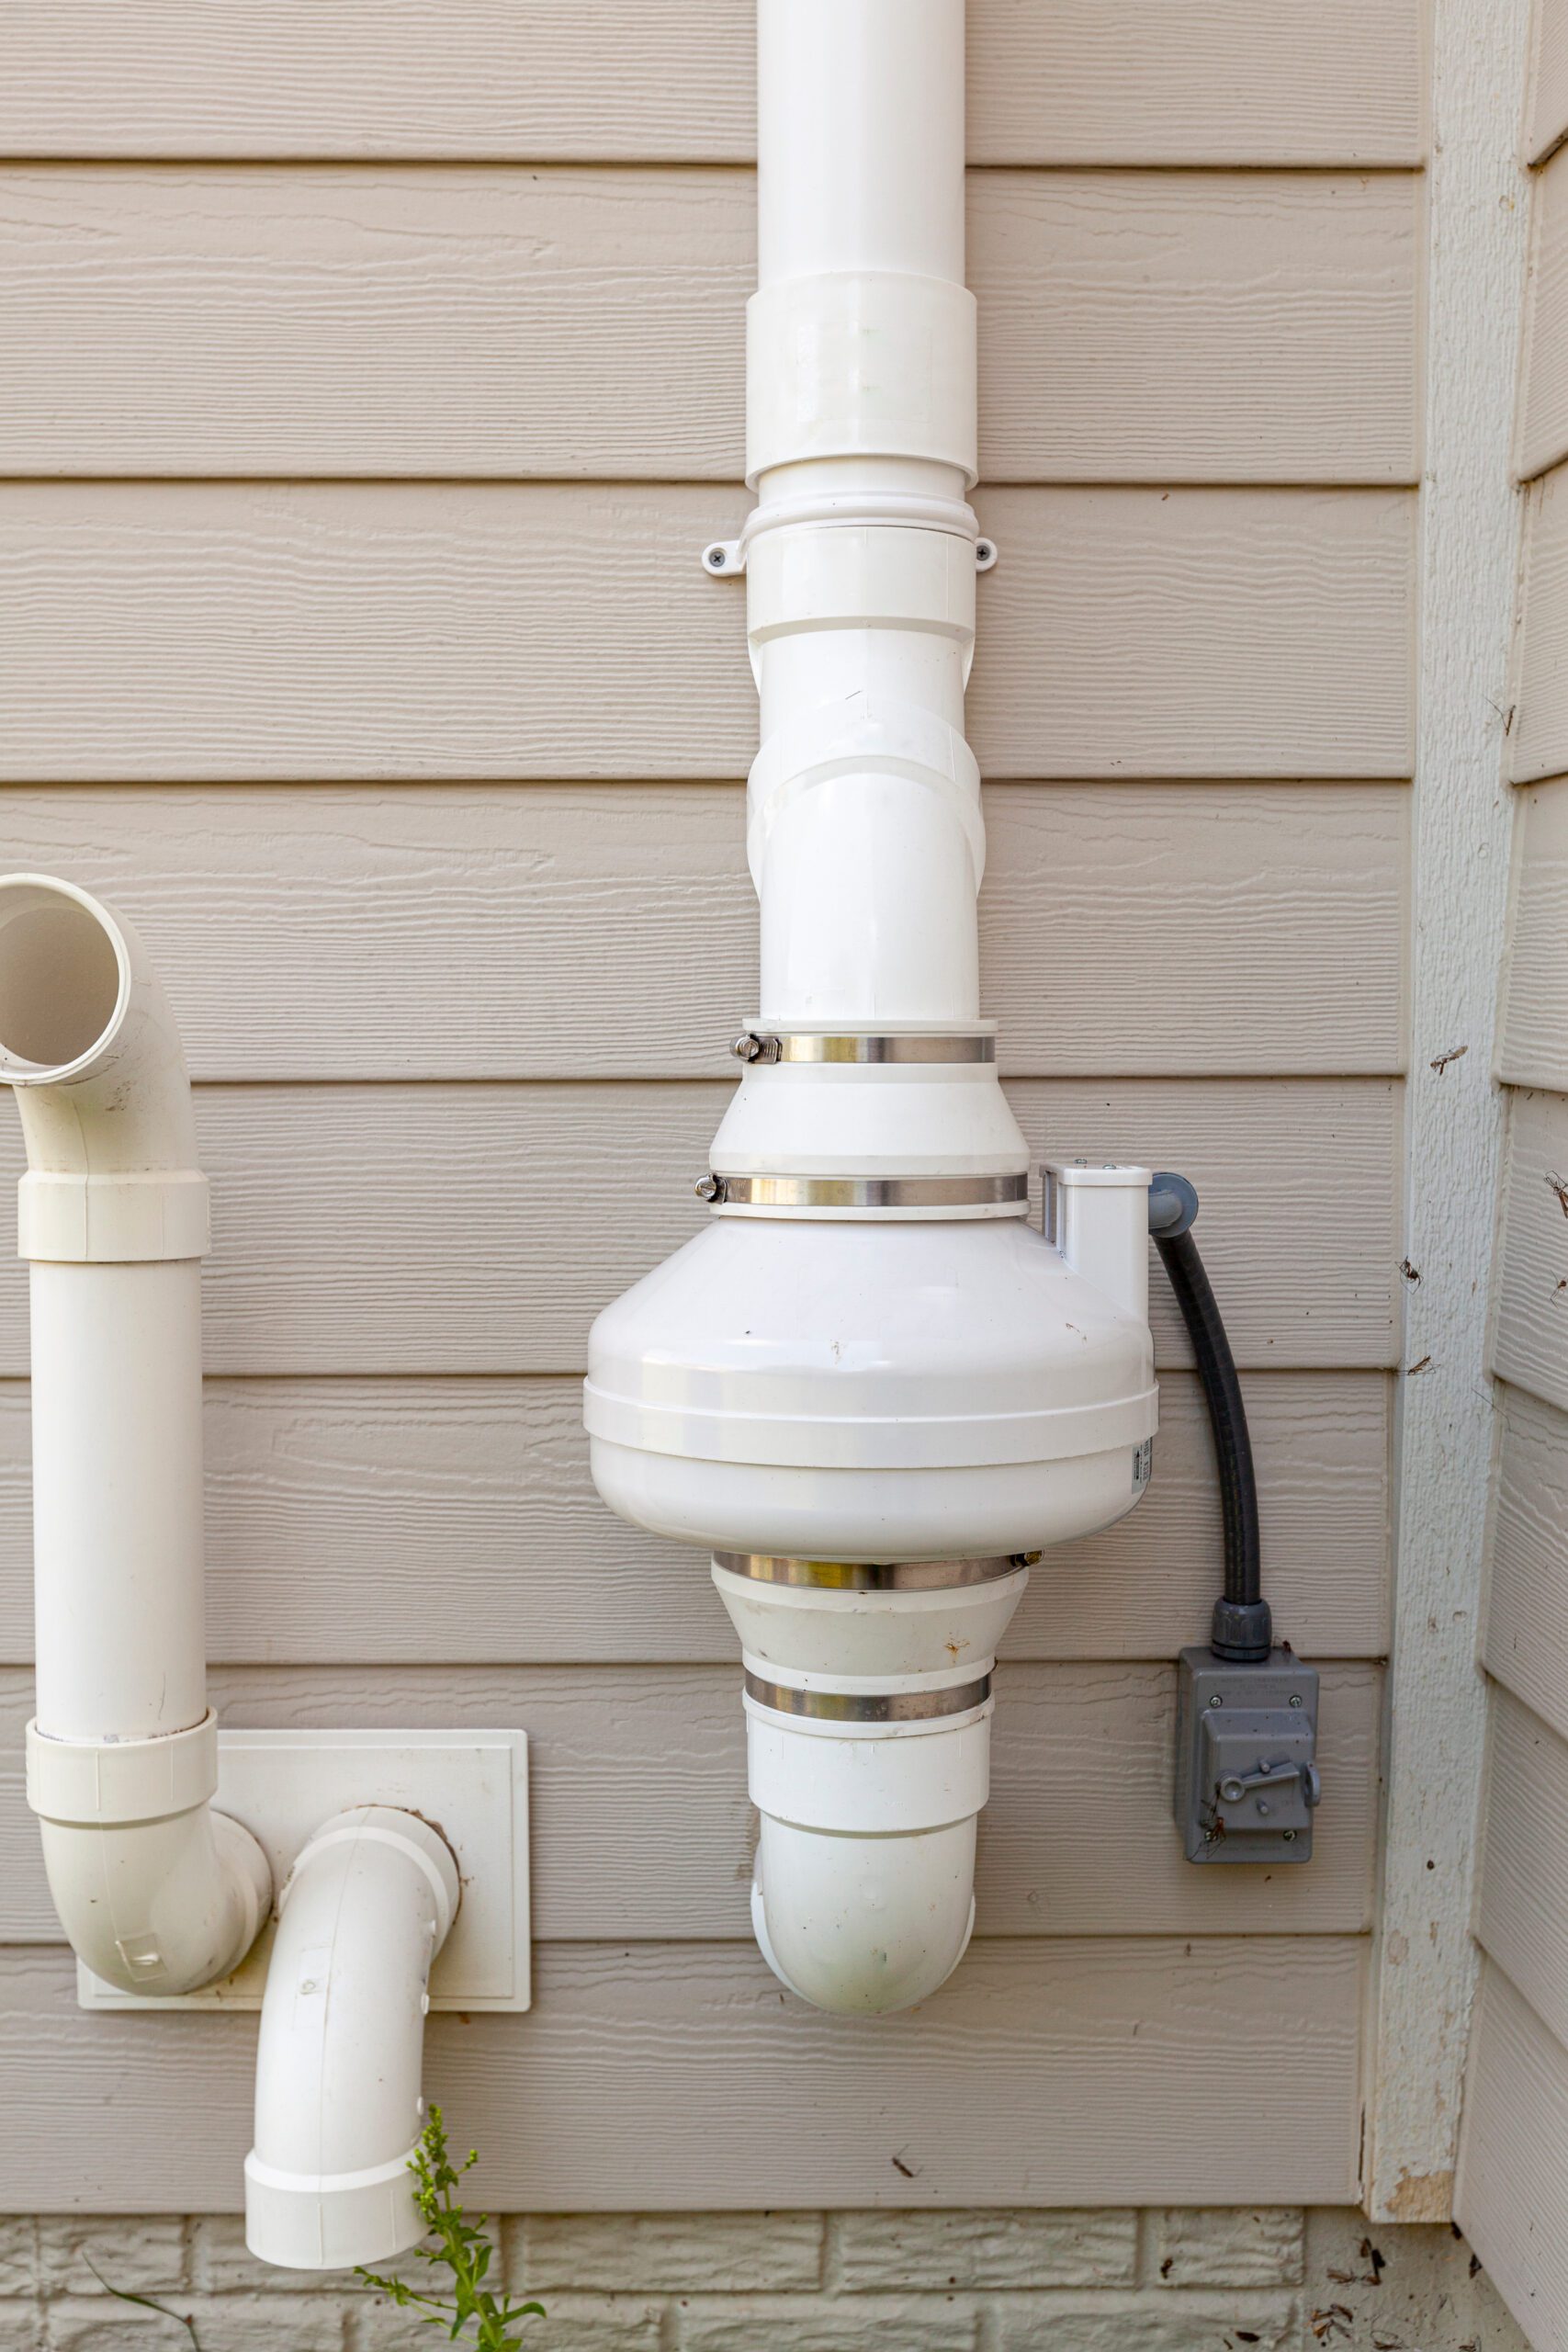
A contractor drills through your basement floor and installs a PVC pipe that extends from beneath the foundation all the way through your roof. An inline fan creates continuous suction, pulling radon gas from the soil before it can enter your home and safely venting it above the roofline where it dissipates harmlessly into the atmosphere.
If your basement is unfinished, installing this system is relatively straightforward. The contractor routes the pipe along walls or in corners, secures it properly, and you can design your finishing plans around the equipment.
If your basement is already finished, the contractor needs to:
- Cut through finished flooring to access the concrete
- Drill through your concrete floor
- Route PVC pipes through finished walls or ceilings
- Either hide the pipes inside walls (requiring drywall removal and replacement) or run them externally (creating aesthetic compromises)
- Install the fan
- Repair and refinish all disturbed areas to match existing work
The cost difference is significant. Installing a radon mitigation system in an unfinished basement typically runs $1,200 to $2,500. Retrofitting an already-finished basement often costs substantially more due to demolition, restoration work, and the complexity of routing pipes through completed construction.
How to Design Basement Finishing Around Radon Mitigation
If your radon test comes back above 4 pCi/L, don’t panic. Radon mitigation is highly effective, and you can integrate the system into your basement design so seamlessly that guests won’t even notice it.
Strategic Pipe Routing
Work with your basement finishing contractor and radon mitigation specialist together. The mitigation pipe typically runs 3-4 inches in diameter – about the width of a standard drainpipe. Smart design options include:
- Corner placement: Route the pipe in a corner that will become a utility closet, bathroom, or storage area. Once walls are framed, the pipe disappears entirely.
- Utility room integration: If you’re planning a basement bathroom, laundry area, or mechanical room, these spaces already have exposed pipes and utility infrastructure. One more pipe blends right in.
- Decorative columns or boxing: Build a small chase or decorative column around the pipe. Paint it to match your walls, and it becomes an architectural feature rather than an eyesore.
- Behind built-ins: Planning floor-to-ceiling bookshelves, an entertainment center, or storage units? Route the pipe behind these features.
Fan Location Considerations
The radon mitigation fan needs to be installed in an unheated space to prevent condensation issues. Most Michigan installations place the fan in the attic or mount it on the home’s exterior. Discuss fan placement early in planning to ensure your basement finishing design accommodates the pipe routing to reach the fan location.
Sealing Foundation Penetrations
Professional radon mitigation doesn’t just rely on the suction pipe – it also includes sealing major foundation cracks, gaps around utility penetrations, and the floor-wall joint where applicable. These sealing measures happen before you frame walls and install flooring, making them much more effective and less disruptive when completed as part of the initial construction sequence.
The Testing Process: What to Expect
Testing your basement for radon is straightforward, inexpensive, and takes less than a week. Here’s the process:
Step 1: Get a Test Kit
Contact your local health department to request a free radon test kit, or purchase one from hardware stores or online retailers. Short-term tests typically cost $15-30 if you’re buying them yourself.
Step 2: Place the Test
Position the test kit in your basement’s lowest livable level. Place it at least 20 inches off the floor, away from drafts, high humidity areas, and exterior walls. If you’re planning to finish a specific area, test that space.
Step 3: Maintain Closed-House Conditions
For the 2-7 day testing period (depending on test type), keep all windows closed and exterior doors closed except for normal entry and exit. Don’t run whole-house fans or operate fireplaces, which can artificially lower radon readings.
Step 4: Send for Analysis
After the testing period, seal the kit and mail it to the designated laboratory. Results typically arrive within 1-2 weeks via email or postal mail.
Step 5: Interpret Your Results
Results below 2 pCi/L are considered low risk. The EPA recommends considering mitigation for results between 2-4 pCi/L. Anything at or above 4 pCi/L requires action.
Working with Contractors Who Understand Radon
Here’s something that frustrates us about the basement finishing industry: too many contractors never mention radon. They’re eager to start framing walls and collecting deposits without asking if you’ve tested.
A responsible contractor should ask about radon testing before providing a finishing estimate. If they don’t bring it up, you should. Here are questions to ask:
- “Have you worked on basements with radon mitigation systems installed?”
- “Can you coordinate with a radon mitigation contractor if testing shows we need one?”
- “How would you design the finishing layout to accommodate radon mitigation equipment?”
- “Do you seal foundation cracks and penetrations as part of your basement finishing process?”
If a contractor dismisses radon concerns or suggests you can “deal with it later,” find someone else. Your family’s health isn’t something to gamble with.
Michigan’s Radon Mitigation Landscape
One quirk of Michigan law: the state doesn’t license or regulate radon testing or mitigation contractors. This means anyone can claim to be a radon professional without formal qualifications or oversight.
Look for contractors certified through the National Radon Proficiency Program (NRPP) or the American Association of Radon Scientists and Technologists (AARST). These third-party certifications demonstrate that contractors have completed proper training and adhere to industry standards.
Ask to see certification credentials, request references from recent projects, and verify that contractors carry appropriate liability insurance. A properly installed mitigation system should reduce radon levels below 4 pCi/L and often brings levels down to 2 pCi/L or lower.
The Real Cost of Skipping Radon Testing
Let’s talk about what happens if you skip radon testing and finish your basement anyway.
Scenario one: You get lucky. Your home’s radon levels are naturally low, and you saved yourself the testing expense and potential mitigation costs. You finish your basement, enjoy the space, and never have a problem.
Scenario two: You’re not lucky. Three years after finishing your beautiful basement, you decide to sell your home. The buyer’s inspection reveals radon levels of 8 pCi/L. Now you’re facing several bad options:
- Install a mitigation system that requires cutting through your finished flooring and routing pipes through walls or ceilings you’ll need to repair and repaint
- Reduce your sale price to account for the buyer’s mitigation costs
- Lose the sale entirely as the buyer walks away from the deal
Scenario three: You finish the basement, your teenager moves into the new bedroom, and your family spends years being exposed to elevated radon levels without knowing it. The health risks accumulate silently.
Testing costs less than $50. Mitigation costs $1,200-$2,500 when completed before finishing. Which scenario would you rather face?
🏗️ Getting Your Basement Project Right From the Start
The best time to address radon is right now, before you invest thousands in basement finishing. Here’s the smart sequence:
- Week 1-2: Order and deploy a radon test kit in your basement. Maintain closed-house conditions for the testing period.
- Week 3: Receive your radon test results. If levels are below 2 pCi/L, proceed with basement finishing plans. If levels are between 2-4 pCi/L, consider mitigation. If levels are 4 pCi/L or higher, schedule radon mitigation.
- Week 4-6: If needed, have a certified radon mitigation system installed. Verify the system reduces levels below 4 pCi/L through post-mitigation testing.
- Week 7+: Begin basement finishing work, designing around the mitigation system if one was installed.
This sequence protects your family’s health, saves money compared to retrofitting, and ensures your finished basement is safe, beautiful, and adds maximum value to your home.
At Leach Construction, we’ve been helping Southeast Michigan homeowners with basement projects for decades. We know Michigan basements inside and out – from our clay-rich soil and high water tables to our radon risks and building code requirements. When you work with contractors who understand these regional challenges, you get a finished basement that’s built right from the foundation up.
Planning a basement finishing project? Contact Leach Construction for a consultation. We’ll help you create a beautiful, functional, and safe space your family can enjoy for years to come.